You can find TestPoints here >>
Huawei HiSilicon OLD series
Unlock
- Turn the phone ON and wait until it fully starts up
- Set the phone into the Manufacture Mode by entering *#*#2846579#*#* code (follow the instruction from the Enable Manufacture Mode manual)
- Connect the phone to PC using USB cable
- Install phone drivers (only if the phone is connected for the first time).
- Select "HISILICON" platform from the tab menu in the upper left side of the software
- Wait for 10 seconds
- Go to "Unlock" tab
- Select "Android Adapter PCUI". If there is no such port, select "Comneon Mobile High-speed Modem"
- Press "Unlock" button
- The message "Unlock done… OK" indicates that procedure has been completed successfully
- Disconnect the handset
- A phone is unlocked
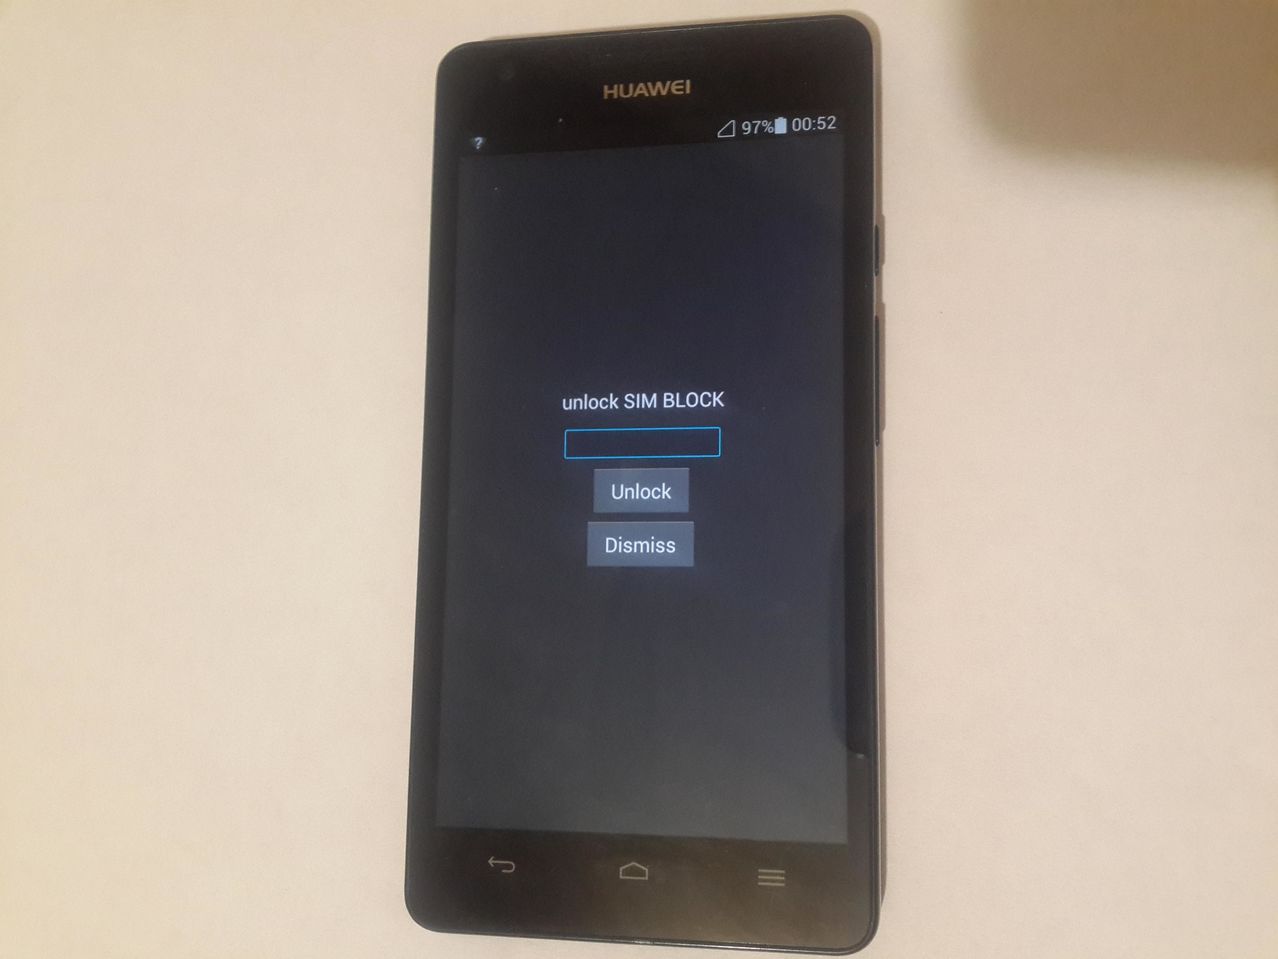
If you have SP-locked phone, which you tried to unlock with codes, but you've entered an incorrect code multiple times, you'll see a new request on your phone screen: Unlock SIM BLOCK". In order to bypass this code you need to Reset Wrong Code Counter. For this purpose, please, perform “Direct unlock” or “IMEI Repair” procedure.
- Turn the tablet ON and wait until it fully starts up
- Enable "USB Debugging" on your Android device
- Set the tablet into the Manufacture Mode: Open Calculator APP, type in “()()2846579()()=” to enter the hidden system menu
- Connect the device to PC using USB cable
- Install the drivers (only if the device is connected for the first time).
- Select "HISILICON" platform from the tab menu in the upper left side of the software
- Wait for 10 seconds
- Go to "Unlock" tab
- Select "Android Adapter Modem" port
- Press "Unlock" button
- The message "Unlock done… OK" indicates that procedure has been completed successfully
- Disconnect the device
FRP Remove and Huawei ID remove:
- Select "HISILICON" platform from the tab menu in the upper left side of the software
- Go to "Service" tab
- Turn the phone OFF
- Set the phone to FastBoot mode:
- press and hold “VOL-“ button and connect the phone to PC, using USB cable (or use any other method)
- Select “Android ADB interface” port
- Press “Remove FRP” button
- The message "Unlock done… OK" indicates that procedure has been completed successfully
- Disconnect the device
Warning: This feature will erase all phone’s data and accounts
If after FRP removal user data was not wiped automatically, perform this procedure manually in the recovery mode.
To install the drivers for required phone follow this link
- Select "Android ADB" platform from the tab menu in the upper left side of the software.
- Go to "HiSilicon" tab, if you have HiSilicon-based phone. Or go to Qualcomm tab, if your phone is Qualcomm-based.
- Turn the phone ON and connect it to PC with the USB cable.
- Select “Android ADB interface” port.
- Press “Remove FRP” button.
- The phone will ask to confirm RSA key fingerprint.
- If phone is not asking for RSA key fingerprint:
- Cancel the Remove FRP operation.
- Reboot the phone manually.
- Run the Remove FRP operation once again.
- If phone is not asking for RSA key fingerprint:
- The message "Removing FRP… Done" indicates that procedure has been completed successfully.
- Disconnect the phone.
- Reboot the phone.
- Perform Master Reset from the phone menu.
Enable Manufacture Mode
- Open the hidden device menu: dial "*#*#2846579#*#*"
- Select "Project Menu" -> "Background Settings" -> "USB Ports Settings" -> "Manufacture Mode"
Procedure
- Internet connection has to be enabled, proxy disabled. Root is not required
- Select "HISILICON" platform from the tab menu in the upper left side of the software
- "Phone model" dropdown box has to be set to "Autodetect"
- Go to "Service" tab
- Power the phone ON and connect it to PC with USB cable
- Install required Huawei smartphone driver (only if the phone is connected for the first time)
- Select "Android Adapter PCUI" port
- Press "FRP remove / Huawei ID" button
- Turn the phone ON and wait until it fully starts up
- Set the phone into the Manufacture Mode by entering *#*#2846579#*#* code (follow the instruction from the Enable Manufacture Mode manual)
- Connect the phone to PC using USB cable
- Install phone drivers (only if your phone is connected for the first time).
- Select "HISILICON" platform from the tab menu in the upper left side of the software
- Wait for 10 seconds
- Go to "Service" tab
- Select "Android Adapter PCUI". If there is no such port, select "Comneon Mobile High-speed Modem"
- Press "Get Huawei Bootloader Password" button
- The code will be read immediately
- Disconnect the handset
Service
- Turn the phone ON and wait until it fully starts up
- Set the phone into the Manufacture Mode by entering *#*#2846579#*#* code (follow the instruction from the Enable Manufacture Mode manual)
- Connect the phone to PC using USB cable
- Install phone drivers (only if the phone is connected for the first time).
- Select "HISILICON" platform from the tab menu in the upper left side of the software
- Wait for 10 seconds
- Go to "IMEI" tab
- Select "Android Adapter PCUI". If there is no such port, select "Comneon Mobile High-speed Modem"
- Enter IMEI number in the "Phone IMEI" field
- Press "Repair IMEI" button
- The message "Done" indicates that procedure has been completed successfully
- Wait for the message "Restarting phone... Done" to appear in the dialog window; only after that you can turn the phone off.
- If the program asks you to perform Factory Data Reset via phone's menu, please do so.
- Turn the tablet ON and wait until it fully starts up
- Enable "USB Debugging" on your Android device
- Set the tablet into the Manufacture Mode: Open Calculator APP, type in “()()2846579()()=” to enter the hidden system menu
- Connect the device to PC using USB cable
- Install the drivers (only if the device is connected for the first time).
- Select "HISILICON" platform from the tab menu in the upper left side of the software
- Wait for 10 seconds
- Go to "Unlock" tab
- Select "Android Adapter Modem" port
- Press "Unlock" button
- The message "Unlock done… OK" indicates that procedure has been completed successfully
- Disconnect the device
- This option is available via ADB interface. Please, follow this link for details
Flash:
- Power the phone ON
- Set the phone to manufacture mode
- Open HiSilicon tab and go to Flash bookmark
- Select "Android Adapter PCUI" port
- Press “ENABLE DOWNGRADE” button
- You need to reflash the phone after using this feature
You may use it:
- To downgrade phone’s firmware version (for example, downgrade from higher to lower one).
How to do this:- Enable downgrade in Manufacture mode.
- Reflash the device in upgrade mode: vol+vol- and connect USB cable.
- To change phone’s localization (for example, to switch from Operator1 to Operator2).
How to do this:- Change provider settings (in manufacture mode).
- Enable downgrade (in manufacture mode).
- Flash the phone with the firmware that fits the selected provider settings (using upgrade mode: vol+vol- and connect USB cable).
Enable Manufacture Mode
- Open hidden device menu: dial "*#*#2846579#*#*"
- Select "Project Menu" -> "Background Settings" -> "USB Ports Settings" -> "Manufacture Mode"
Procedure
- Internet connection has to be enabled, proxy disabled. Root is not required
- Select "HISILICON" platform from the tab menu in the upper left side of the software
- "Phone model" dropdown box has to be set to "Autodetect"
- Go to "IMEI" tab and tick “Huawei”
- Connect your device to PC with USB cable
- Install required Huawei smartphone driver (only if the phone is connected for the first time)
- Select "Android Adapter PCUI" port
- Enter Wi-Fi, Bluetooth or Serial number in the required fields
- Press "Repair" button
- Message "Done" indicates that the procedure has been completed successfully
- Internet connection has to be enabled, proxy disabled
- Enable "USB Debugging" on your Android device
- Enter hidden device menu:
- Smartphones: Dial "*#*#2846579#*#*"
- Tablets: Open Calculator APP, type in "()()2846579()()="
- Select "Project Menu"
- Select "Background Settings"
- Select "USB Ports Settings"
- Choose "Manufacture Mode"
This feature is intended to be used for phones that won’t turn on, freeze on logo, etc., but still can enter fastboot mode. It's not intended for regular reflashing.
Procedure:
- Connect the phone in fastboot mode (vol- power ON) to PC
- Select corresponding firmware files just as it is described in the UPGRADE MODE flashing manual.
Important! You will have to select different amount of files for phones with UFS flash type and for old phones / phones without UFS flash type. That’s why in each specific case you need to choose flash files for each certain phone/version. - When the phone starts up normally, reflash it in UPGRADE mode using the corresponding to it flash file
Benefits:
STEP 1: Save (or write down) original version of your phone:
Read from Fastboot mode and write down for yourself:
- original phone firmware version
- original phone model
- customization version
You may use Get device info feature on Service tab, it reads the phone information from Fastboot mode.
STEP 2: Prepare the firmware files:
Unpack original Huawei flash file.
It must be full SD-Upgrade package, not OTA update.
Phones with UFS flash type:
The firmware consists of 3 archives. Every archive contains unique UPDATE.app and PTABLE.app files.
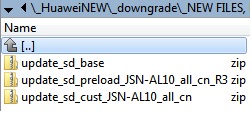
You need to unpack each archive. Don't mix up the files!
into separate folder!
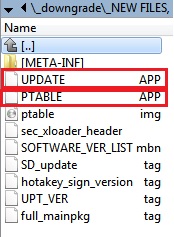
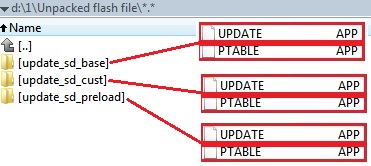
- update_sd_base folder: UPDATE.APP and PTABLE.APP
- update_sd_cust folder: UPDATE.APP and PTABLE.APP
- update_sd_preload folder: UPDATE.APP and PTABLE.APP
Every folder has to contain UPDATE.APP and PTABLE.APP files.
Old phones / phones without UFS flash type:
Unpack update.app flash file and localization file (if your firmware contains this localization.app file).
STEP 3: Set the phone to Upgrade mode:
Phones with UFS flash type: Press and hold VOL+ and Power ON buttons. Select "Upgrade mode -> USB upgrade" from the menu that will appear.
Old phones / phones without UFS flash type: vol+vol- and connect USB cable.
Important: SD-card should be removed from the phone.
STEP 4: Select files for flashing:
- Open HiSilicon tab and go to Flash bookmark
- Select PCUI port or DBA adapter port (different phone models show different ports) in the port selection tab
- In case the phone does not enter Upgrade mode, try to enter it using Rescue mode entering manual
- Select files for flashing:
Phones with UFS flash type:
Important! You need to select 6 files for flashing exactly in this order.
FLASH FILE 1: PTABLE.APP from update_sd_base folder
FLASH FILE 2: PTABLE.APP from update_sd_cust folder
FLASH FILE 3: PTABLE.APP from update_sd_preload folder
FLASH FILE 4: UPDATE.APP from update_sd_base folder
FLASH FILE 5: UPDATE.APP from update_sd_cust folder
FLASH FILE 6: UPDATE.APP from update_sd_preload folder
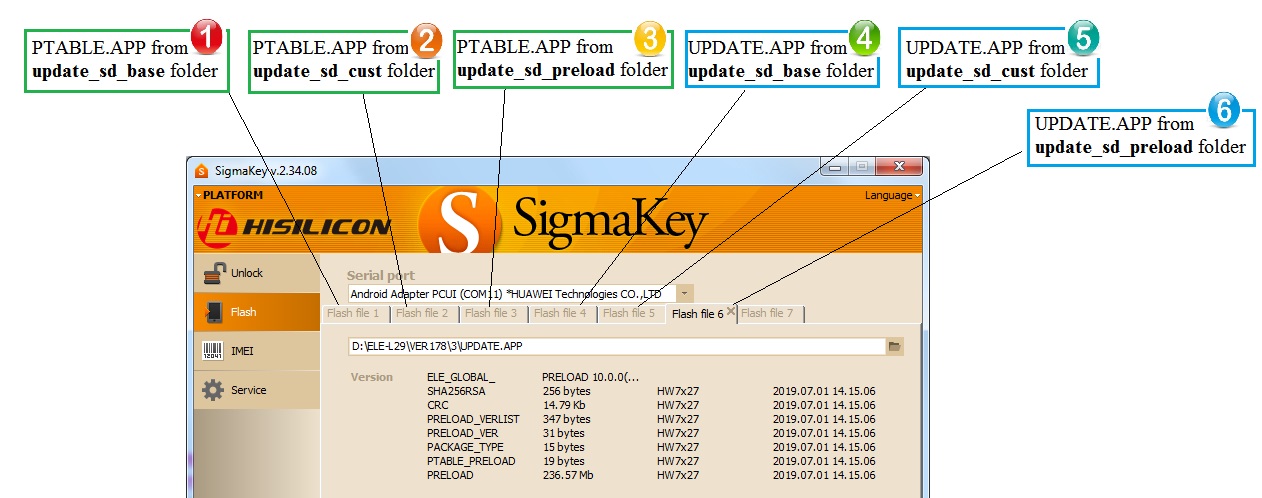
If you mix up the order of flashing, this will cause phone's death!
Old phones / phones without UFS flash type:
FLASH FILE 1: Select UPDATE.APP flash file
FLASH FILE 2: Select localization/customization file (if your firmware contains this *.APP file)
STEP 5: Write Flash:
- Press “Write flash” button
- Perform Wipe Data/Cache via phone's recovery
Important! All partitions of the firmware will be written to the phone in Upgrade mode.
NOTE! The flashing operation is very risky! This feature is intended for advanced users only.
Do the operation at your own risk. We are not responsible for any damages.
What is FULL OTA-UPDATE files?
- FULL OTA-UPDATE files are openly located in the internet and are intended for flashing phones in OTA mode.
- The software exclusively allows flashing this type of files. But, this feature is specially designed only for advanced users.
- You may use this type of files for upgrade and for downgrade flashing.
- The main purpose or full OTA files is phone's update, so make downgrade operations at your own risk.
Where to get FULL OTA-UPDATE files?
You can find and download the files for your model here.
How to use FULL OTA-UPDATE files?
- The firmware flashing procedure does not differ from the overall flashing through the UPGRADE MODE described in the UPGRADE MODE flashing manual.
- The only difference is that you need to tick "USE full OTA UPDATE" when you select FULL OTA UPDATE file
- Use only FULL OTA UPDATE files. They are marked with "FullOTA-MF"
WARNING!
Keep in mind that this functionality is only for super-advanced users who clearly understand how to flash Huawei phones!
Use this type of file at your own risk.
Before servicing the phone, please make sure that:
- You use the latest version of the software
- Battery must be connected to the phone's board and fully charged. Especially while performing operations using testpoint.
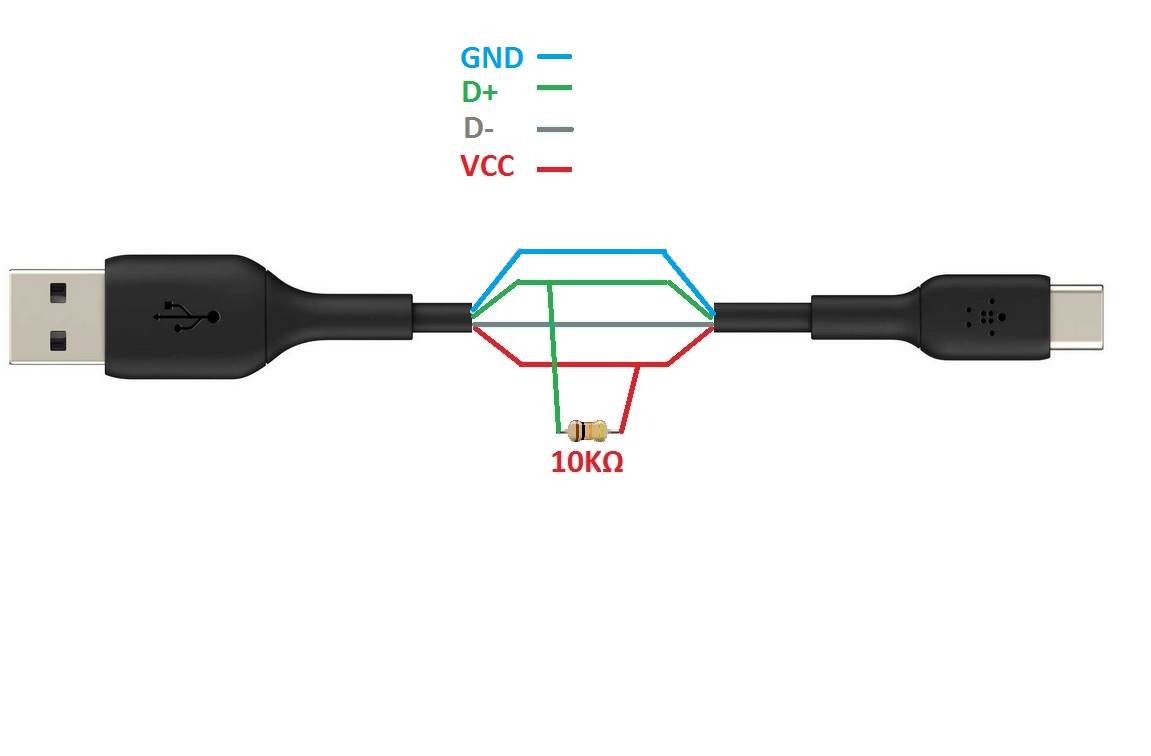
- Huawei devices with latest security versions: you will have to use hardware testpoint and modified USB cable.
- All the side programs, that may interfere with the phone, are closed
- Phone’s cable and device itself should not be disconnected or disturbed until the procedure is fully completed
- Connect phone to USB port placed on the backside of PC (motherboard's USB port)
Do not connect or disconnect other USB cables into the PC during the actual work with the phone - Avoid using any kind of USB HUBs and long USB cables. Use the shortest-length USB cable available.
- Phone has stock (factory) firmware version
- SIM card is removed